How to Calibrate your hoop!
19th Sep 2022
Do you have trouble getting your hooping just right? It’s too loose and the fabric shifts or it’s too tight and when it’s done it shows puckering. I used to have that problem too. I almost gave up embroidery because I couldn’t “master” the hoop. So I spent two weeks doing a “study of the hoop”. And this is what I came up with.
Hoop Calibration and Fabric Prep
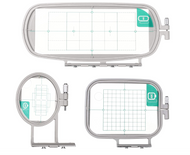
Hoop calibration is a method of pre-setting your hoop for the stabilizer and fabric combination that you will be using in your project. Even if your project is a one-time job, it is well worth the time to “calibrate” your hoop. And here is how to do it. You’ll need the hoop you plan to use, along with a stabilizer cut to size – recommended a 1” excess around all 4 sides – and the fabric for your project – if this is a test use the same or like fabric as your project. Open your hoop so that it is loose and easy to fit the fabric and stabilizer. Lay the bottom hoop onto a flat and firm surface. Lay the stabilizer and fabric over the bottom hoop – it doesn’t have to lay in perfect but should be flat and smooth-ish. Apply the upper hoop in its place and press to seat it. Now turn the thumb screw to tighten the bottom hoop to your sandwich of stabilizer, fabric, and upper hoop. Make it firm – firm enough that when you tug on the fabric it doesn’t pull out of place. Once this is set – turn the screw back 1.5 turns. This should loosen the hoop enough to “pop” the fabric and stabilizer free of the hoops. From here and until you finish with this fabric stabilizer combination do not turn that thumb screw more than 1.5 turns to loosen or 1.5 turns to tighten. If you do you will have to start over. Set the hoops aside – it’s now time for fabric preparation.
Fabric Prep is a method to prepare your fabric for embroidery stitching. You will need a spray starch and a home iron set to the recommended heat setting for your project fabric, and a pressing surface such as an ironing board. Preheat your iron to the necessary heat setting and while it is heating spray your fabric with the starch – you do not need to saturate the fabric with the spray but enough to cover the fabric area to be hooped and stitched. While your iron is still heating your starch is soaking into the fibers of the fabric – this is good, it will prevent starch from burning and flaking. When the iron is ready press your fabric from the center out.
NOTE: Pressing is different from Ironing. To press is to lift the iron plate off the fabric and set it down again in a new place. Ironing is the action of rubbing the iron plate across the fabric back and forth – Be careful not to iron – ironing will also stretch your fabric and distort it. And when it relaxes again – un-stretch – it will show puckers.
If you are going to use a fusible stabilizer this is the time to fuse it to the fabric back – If you are using a light spray of fabric adhesive – spray your stabilizer and apply it to the back side of the fabric making sure to smooth center out and not stretch the fabric.
Time to hoop! Bring your previously set aside calibrated hoops to your firm flat surface. Place the bottom hoop down, lay in your fabric stabilizer combination – carefully – over the bottom hoop, and place your upper hoop over the two. Carefully press the hoops in place using the heels of your hands at the bottom of the hoop set and working the pressure upward to the top of the hoop. You will need to apply pressure to make this happen. Tighten your hoops by turning the thumb screw for 1.5 turns. Turn your hoops over and test for tautness. You can do this by making a “snowplow” of your first three fingers. Hold them together and it will look like a V plow – place your fingers at the bottom of the fabric hoop and using only a light pressure – “plow” your fingers to the top of the fabric in the hoop. If your fingers push the fabric forward – you will need to start over. Hooping takes practice – don’t give up if you have to do it again and again. Once you have mastered hooping any issues of pucker or registration issues will be virtually gone.

